SSL bumping ile Ubuntu 22.04 üzerinde Squid Server 5.7
Squid 5.7 yi ubuntu 20.04 üzerine compile ederek kaynaktan kurmak için yapılması gerekenler
Derlemek için ön gereklilikler
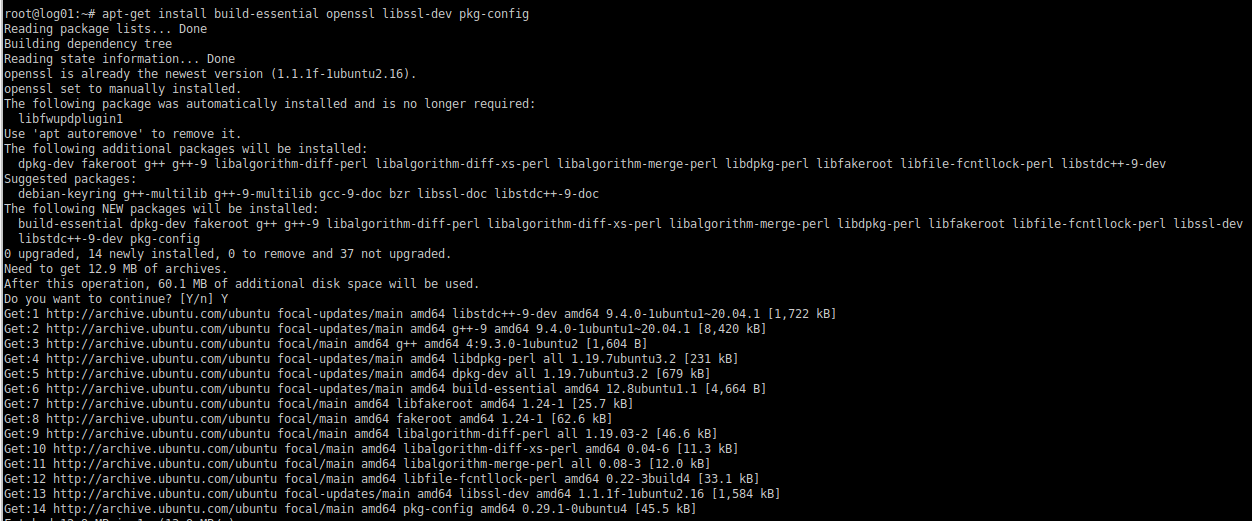
apt-get install build-essential openssl libssl-dev pkg-config
Bu işlem bitince download ediyoruz
wget -c http://www.squid-cache.org/Versions/v5/squid-5.7.tar.gz
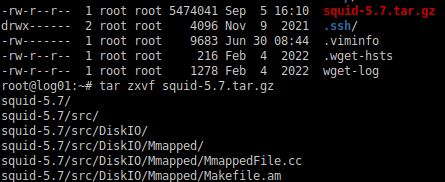
Download edilen kaynak dosyasını açıyoruz.
tar zxvf squid-5.7.tar.gz
Çıkardığımız klasöre geçiyoruz
Derleme
Aşağıdaki parametreler ile compile başlatıyoruz
./configure --prefix=/usr --with-openssl --enable-ssl-crtd --localstatedir=/var --libexecdir=${prefix}/lib/squid --datadir=${prefix}/share/squid --sysconfdir=/etc/squid --with-default-user=proxy --with-logdir=/var/log/squid --with-pidfile=/var/run/squid.pid
Hiçbir warning yada hata almadan bitmeli. Ardından derleme işlemini aşağıdaki komut ile başlatıyoruz. Bu 15 dakika kadar sürebiliyor.
make all
Make işlemi sorunsuz şekilde bittikten sonra
make install
yapıyoruz ve kurulum bitiyor.
Kontrol edelim.
squid -v
Aşağıdaki gibi görünmeli
Systemd dosyası
Systemd servisi Ubuntu 22.04 versiyon linux kurulumlarının sistem servis yöneticisidir. Bu yöneticiye squid için gerekli detayların eklenmesi gerekir.
Derleyerek kurduğumuz squid 5.7 systemd dosyasyı olmadan gelir, oluşturmak için aşağıdaki şablonu kullana bilirsiniz
## Copyright (C) 1996-2022 The Squid Software Foundation and contributors
##
## Squid software is distributed under GPLv2+ license and includes
## contributions from numerous individuals and organizations.
## Please see the COPYING and CONTRIBUTORS files for details.
##

[Unit]
Description=Squid Web Proxy Server
Documentation=man:squid(8)
After=network.target network-online.target nss-lookup.target

[Service]
Type=forking
PIDFile=/var/run/squid.pid
#ExecStartPre=/usr/sbin/squid -z
ExecStart=/usr/sbin/squid -f /etc/squid/squid.conf -d1
ExecStop=/usr/sbin/squid -k shutdown
ExecReload=/usr/sbin/squid -k reconfigure

[Install]
WantedBy=multi-user.target
Bu şablonu kopyalayıp aşağıdaki komutu kullanarak yeni systemd servis dosyasının içine kopyalayalım
sudo nano /lib/systemd/system/squid.service
kopyaladıktan sonra aşağıdaki gibi görünmelidir.
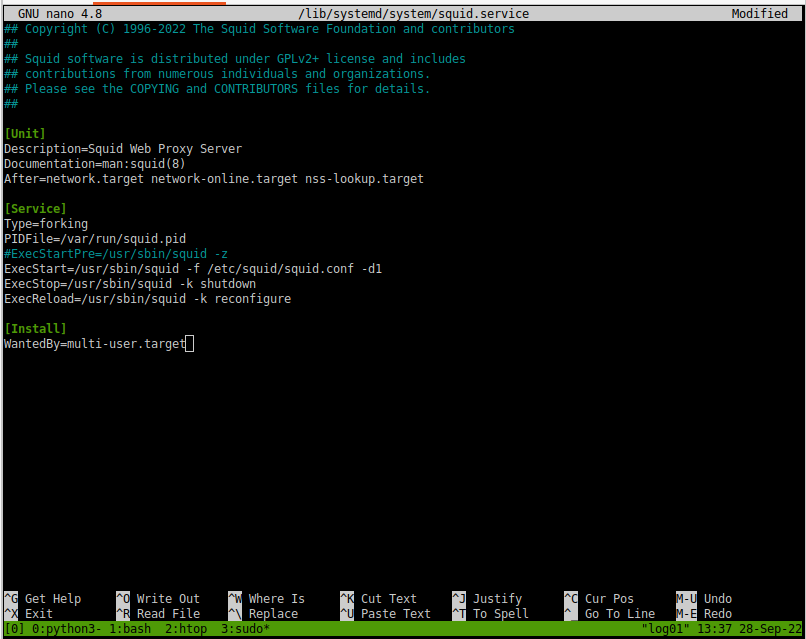
ctrl+x, yes, yes yapıp çıkıyoruz
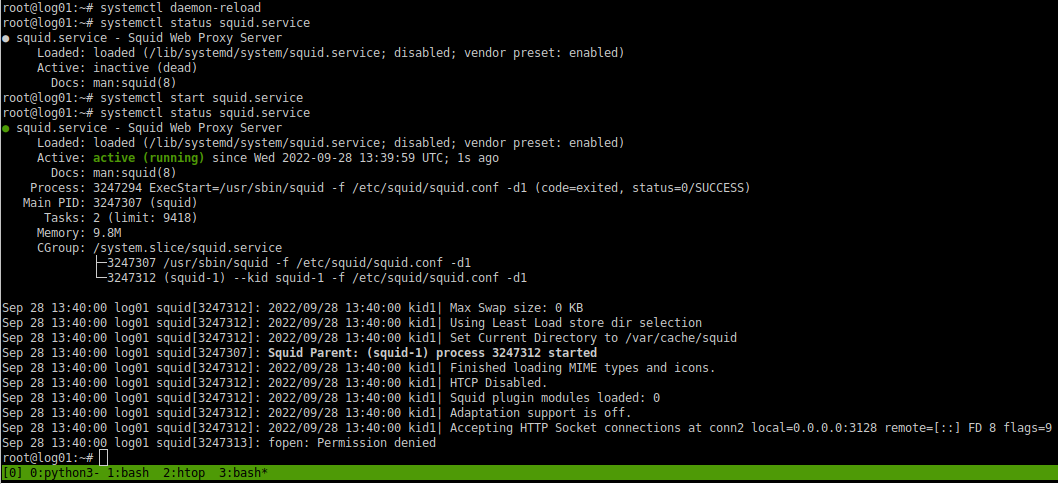
root@log01:~# systemctl daemon-reload
yapıp dameon dosyalarının yeniden yüklendiğine emin oluyoruz
systemctl status squid.service
yaptıktan sonra squid servisinin çalıştığını görebilirsiniz.
Konfigürasyon
squid konfigürasyon dosyalarının olduğu yere gidiyoruz
cd /etc/squid/
mevcut konfigürasyonu yedekliyoruz.
root@log01:/etc/squid# mv squid.conf squid.conf.disabled
Yeni konfigürasyonu yapıştıracağımız dosyayı nano kullanarak açıyoruz
root@log01:/etc/squid# nano squid.conf
Aşağıdaki şablonu yeni açtığımız dosya içerisine kaydediyoruz.
# Recommended minimum configuration:
#
##
# NTLM
##
#auth_param ntlm program /usr/bin/ntlm_auth --diagnostics --helper-protocol=squid-2.5-ntlmssp --domain=BANKA
#auth_param ntlm children 10
#auth_param ntlm keep_alive off
#icap_send_client_username on
#acl lan proxy_auth REQUIRED


# Example rule allowing access from your local networks.
# Adapt to list your (internal) IP networks from where browsing
# should be allowed
acl localnet src 0.0.0.1-0.255.255.255	# RFC 1122 "this" network (LAN)
acl localnet src 10.0.0.0/8		# RFC 1918 local private network (LAN)
acl localnet src 100.64.0.0/10		# RFC 6598 shared address space (CGN)
acl localnet src 169.254.0.0/16 	# RFC 3927 link-local (directly plugged) machines
acl localnet src 172.16.0.0/12		# RFC 1918 local private network (LAN)
acl localnet src 192.168.0.0/16		# RFC 1918 local private network (LAN)
acl localnet src fc00::/7       	# RFC 4193 local private network range
acl localnet src fe80::/10      	# RFC 4291 link-local (directly plugged) machines

acl SSL_ports port 443
acl Safe_ports port 80		# http
acl Safe_ports port 21		# ftp
acl Safe_ports port 443		# https
acl Safe_ports port 70		# gopher
acl Safe_ports port 210		# wais
acl Safe_ports port 1025-65535	# unregistered ports
acl Safe_ports port 280		# http-mgmt
acl Safe_ports port 488		# gss-http
acl Safe_ports port 591		# filemaker
acl Safe_ports port 777		# multiling http

#
# Recommended minimum Access Permission configuration:
#
# Deny requests to certain unsafe ports
http_access deny !Safe_ports

# Deny CONNECT to other than secure SSL ports
http_access deny CONNECT !SSL_ports

# Only allow cachemgr access from localhost
http_access allow localhost manager
http_access deny manager

# We strongly recommend the following be uncommented to protect innocent
# web applications running on the proxy server who think the only
# one who can access services on "localhost" is a local user
#http_access deny to_localhost

#
# INSERT YOUR OWN RULE(S) HERE TO ALLOW ACCESS FROM YOUR CLIENTS
#

# Example rule allowing access from your local networks.
# Adapt localnet in the ACL section to list your (internal) IP networks
# from where browsing should be allowed


#http_access allow localnet
http_access allow localhost


# And finally deny all other access to this proxy
http_access allow all

# Squid normally listens to port 3128
#http_port 3128
http_port 3128 tcpkeepalive=60,30,3 ssl-bump generate-host-certificates=on dynamic_cert_mem_cache_size=20MB cert=/etc/squid/bump.crt key=/etc/squid/bump.key cipher=HIGH:MEDIUM:!LOW:!RC4:!SEED:!IDEA:!3DES:!MD5:!EXP:!PSK:!DSS options=NO_TLSv1,NO_SSLv3,NO_SSLv2,SINGLE_DH_USE,SINGLE_ECDH_USE tls-dh=prime256v1:/etc/squid/bump_dhparam.pem

# Uncomment and adjust the following to add a disk cache directory.
#cache_dir ufs /var/cache/squid 100 16 256

# Leave coredumps in the first cache dir
coredump_dir /var/cache/squid

#
# Add any of your own refresh_pattern entries above these.
#
refresh_pattern ^ftp:		1440	20%	10080
refresh_pattern ^gopher:	1440	0%	1440
refresh_pattern -i (/cgi-bin/|\?) 0	0%	0
refresh_pattern .		0	20%	4320
sslcrtd_program /usr/lib/squid/security_file_certgen -s /var/lib/squid/ssl_db -M 20MB
sslproxy_cert_error allow all
ssl_bump stare all
Sertifikalandırma
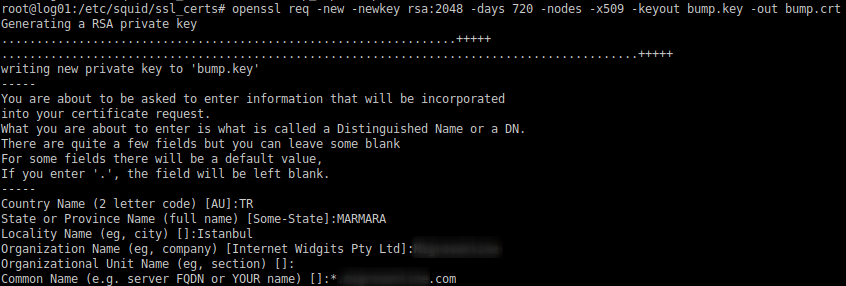
kullanıcılara gönderilecek sertifikayı generate ediyoruz
openssl req -new -newkey rsa:2048 -days 720 -nodes -x509 -keyout bump.key -out bump.crt
Otomatik sertifika jenerasyonu için kullanacağımız parametrelere örnek dosyayı oluşturuyoruz.
openssl dhparam -outform PEM -out /etc/squid/ssl_certs/bump_dhparam.pem 2048
chmod 400 bump_dhparam.pem
Sertifikanını güvenlik ayarlarını yapıyoruz
chown proxy:proxy /etc/squid/bump*
chmod 400 /etc/squid/bump*
Ubuntu için çalışacak olan ssl sertifikalarını içeren klasör ve veri tabanını oluşturuyoruz
mkdir -p /var/lib/squid/ssl_db
/usr/lib/squid/ssl_crtd -c -s /var/lib/squid/ssl_db
devreye alma
Yukarıdaki adımların tamamını yaptıktan sonra,
systemctl restart squid.services
ve kontrol için
systemctl status squid.service
Bu noktadan sonra ;
- oluşturduğumuz ssl sertifikasını clientlara gönderip trusted root authorities klasörüne import ediyoruz
- client üzerinde proxy ayarlarını sunucu_ip _adresi:3128 gösterecek şekilde yapıyoruz.
test için
curl -kv -x http://172.17.21.7:3128 https://docs.mikronet.tech





No comments to display
No comments to display