Network
- Delay and loss tests using netem on a healthy network
- Extending l2 networks using wireguard & gretap
- Generating 1:1 ipfix from 10g pipeline - Getting the data - Part 1
Delay and loss tests using netem on a healthy network
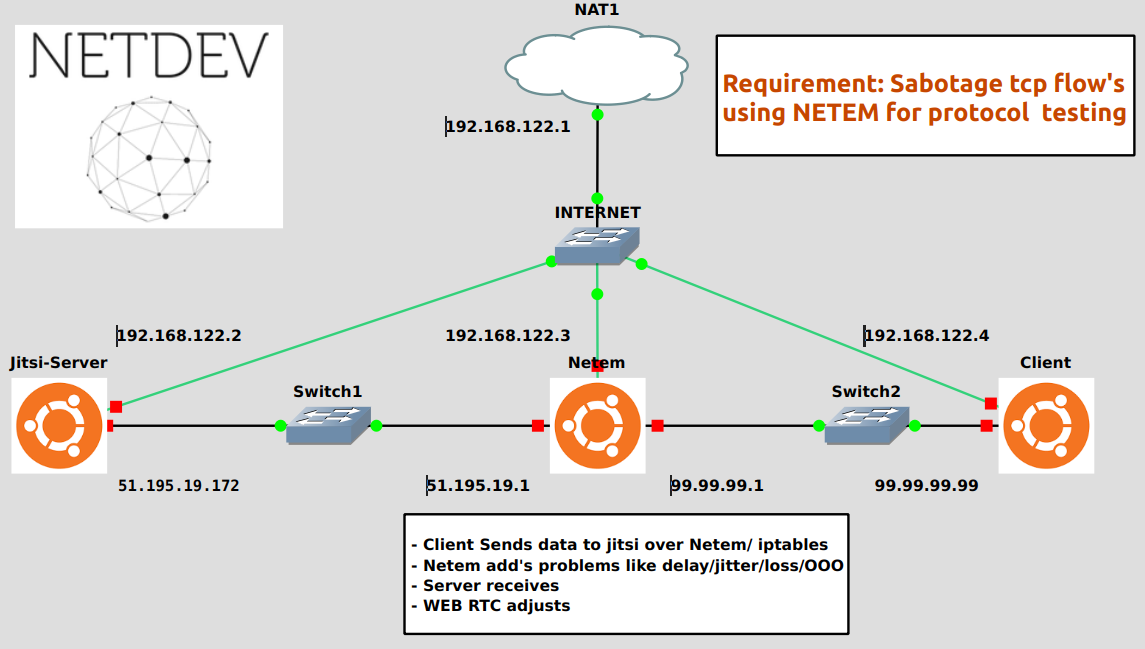
Purpose of this document
We needed a lab environment that can provide a "break on purpose network" to developers to test their code on it. You can add;
- delay
- packet loss
- jitter
- duplicate packets
- unordered flows
to a connection on the fly. To do it we need "netem" modules help.
NETEM
Since kernel 2.6 netem is included in iproute2 package, basically all modern distro's has it now. You can find a documentation on Netem
i am going to explain the required steps here ;
-
create a master traffic class on interface ens8
sudo tc qdisc add dev ens8 root handle 1: prio -
Attach a subclass to tc 1: as 3
  sudo tc qdisc add dev ens8 parent 1:3 handle 30: netem delay 1000ms
  sudo tc filter add dev ens8 protocol ip parent 1:0 prio 3 u32 match ip dst 51.195.19.172 flowid 1:3
Extending l2 networks using wireguard & gretap

At some cases, you might need to extend a vlan over l3 links, and for some reason while;
- you don't want to spend money on devices
- change routing/interface configurations on firewalls.
- No vxlan capable devices in use (i know, there vpls, l2tpv3 and some other solutions but hey it's linux so why not ?)
Then here is your solution, with a simple dnat entry you can extend your vlan.
In my case, customer was in need to backup their vm's using VMWare's replication to their DR center and whenever they needed, they do like to use the DR as Active data center. And changing configs on a disaster situation was the least they want to deal with.
Of course this is only a half of a complete DR solution may less, but restoring a services directly from DR was the requirement as i've been told.
Requirements:
- 2 ubuntu 18.04 machines on both data centers
- for each ubuntu vm 1 interface for l3 tunnel as underlay and one interface to use as tap to extend vlan
- 2 cores were quite powerfull for 200 mbits of througput
- 1 gb ram per machine
- Allowing forged ethernet frames on both tap ports
- 1 cup of coffee and a slice of good chestnut cake
Some caveats ;
- good cpu = good throughput, and the opposite
- do not loop !
- be carefull with the Xstp or you might have a lame root bridge
- My config was interface per vlan, so somone might have a trunk solution.
- No HA solution, those machines needs to be monitored closely, use observium and it's agent
install wireguard
To install wireguard vpn on ubuntu 18.04
#sudo apt update
#sudo apt-get install libmnl-dev libelf-dev linux-headers-$(uname -r) build-essential pkg-config
#sudo apt install wireguard
After installation you'll need to restart operating system and check for installed module, output should be as shown below.
#lsmod| grep wireguard
udp_tunnel	16384 1 wireguard
ip6_udp_tunnel 16384 1 wireguard
generete keys
Wireguard need public and private keys to operate, there is a tool called wg which can generate them as shown below
#wg genkey | sudo tee /etc/wireguard/privatekey | wg pubkey | sudo tee /etc/wireguard/publickey
You can find the keys at /etc/wireguard
create wireguard0.conf
You'll need to create a file called wireguard0.conf at /etc/wireguard
Contents of the file should be like this ;
For initiator:
[interface]
private_key= the_private_key_you_generated
address= 10.10.10.1/24 #ip address of the wireguard0

[peer]
PublicKey = #he public key that you generated on the responder host
AllowedIPs = 10.10.10.0/24 #and the other networks that you'd like route through
EndPoint = internet_address:port
PersistenKeepAlive = 15 #seconds
For responder:
[interface]
private_key= the_private_key_you_generated
address= 10.10.10.2/24 #ip address of the wireguard0
listenPort = 4900

[peer]
PublicKey = #he public key that you generated on the initiator host
AllowedIPs = 10.10.10.0/24 #nd the other networks that you'd like route through
PersistenKeepAlive = 15 #seconds
initiate tunnel
to start the tunnel
wg-quick up wireguard0
to check the status
wg show wireguard0
interface: wireguard0
  public key: +/1R3JqLKlszbaGUSBtckoxNOMuSvLYKUCl03ShoFw8=
  private key: (hidden)
  listening port: 4900

peer: 2f/RmbuvKtR/L2ZFlQBHsVGkTXkA6d1pJO1ay5EjwSQ=
  endpoint: 172.21.23.111:49792
  allowed ips: 10.10.10.0/24, 192.168.5.0/24
  latest handshake: 1 minute, 31 seconds ago
  transfer: 19.10 MiB received, 11.95 MiB sent
install bridge-utils
To install bridge utils
#apt install bridge-utils
enable br_netfilter
to enable
#modprobe br_netfilter
to keep loading on boot
#sudo sh -c 'echo "br_netfilter" > /etc/modules-load.d/br_netfilter.conf'
#cat net.bridge.bridge-nf-call-ip6tables = 1 >> /etc/sysctl.d/bridge.conf
enable routing
To enable routing on the fly
sysctl -w net.ipv4.ip_forward=1
to make it permanent, add lines below to /etc/sysctl.conf ;
# Uncomment the next line to enable packet forwarding for IPv4
net.ipv4.ip_forward=1
fix mss on exit interface
When you are going to use ip tunnel for underlay and gretap for overlay, there will be some serious mss/mtu size problems to fix that, we need the br_netfilter module that we installed before and a special chain to limit the mss size to the max mtu of interface
#iptables -I FORWARD -p tcp --tcp-flags SYN,RST SYN -j TCPMSS --clamp-mss-to-pmtu
We specially use -I to put it at the top of the forward chain.
configure gretap interface
For the initiator:
ip link add gretap0 type gretap local 172.16.5.2 remote 192.168.5.2
For responder
ip link add gretap0 type gretap local 192.168.5.2 remote 172.16.5.2
configure bridge
Now you will add the interfaces to bridge
#brctl addbr br0
add interfaces to bridge br0
#brctl addif br0 ens4
#brctl addif br0 gretap0
Bring everything up
#wp-quick up wireguard0
#ip link set up dev br0
#ip link set up dev gretap0
#ip link et up dev ens4
tests
do pings i've checked that dhcp is working,
what needs to be done are ;
- Multicast packets
- the situation about protocols like vrrp and hsrp
- The effect of broadcast packets to cpu
Generating 1:1 ipfix from 10g pipeline - Getting the data - Part 1
Goal : generate lossles ipfix flow's from distributed pipe to monitor application or network performance, identify bootlenecks and generate alerts if possible.
Why this way ? : It was expensive to do it with proprietary solutions. Plus we needed to have a flexible, open source option to work on. The closest solution cost was $1M
Challenges ;
- We are going to do it using cpu, so lot's of flows require lots of processing power,
- short flows create large ipfix messages than theirselves, any dns flow is is mostly 100 bytes long but a ipfix message for that flow costs us 1000 bytes
- many packets traversing the kernel would create losses so we needed to bypass that
- we need to create custom dashboards, or create alerts.
- deduplication
Plan :
- get mirrors from devices
- produce ipfix from mirrors
- send ipfix data to elastiflow
- design custom dashboards
- design monitor and alerters
What happened along the way;
- Obviously there will be lot's of storage requirement and cpu requirements how ever the current write rate wasn't going to be deadly so we decided to go with using only one server with many ssd drives. We lost the array drives because of a failure in array controller
- We were going to aggregate mirrors from fabric using a Mellanox switch by utilizing it's bridge functions, the asic couldn't manage packet replication this step failed, we bought additional cards and skipped aggregation layer.
- The intel x810-CAQxx cards failed to go in Zero Copy mode, we needed to wait for 2 months for a new firmware from intel
- The tool that we used created problems with intel cards firmware and kernel module. We had to reflash them twice till we found a working state
- The tool had a bug with combining mirrors so we waited for a bugfix.
Current status
We have a working setup, using
this version of intel module

With this version of firmware

You can find some performance outputs as shown below
Server's status
Current traffic rate

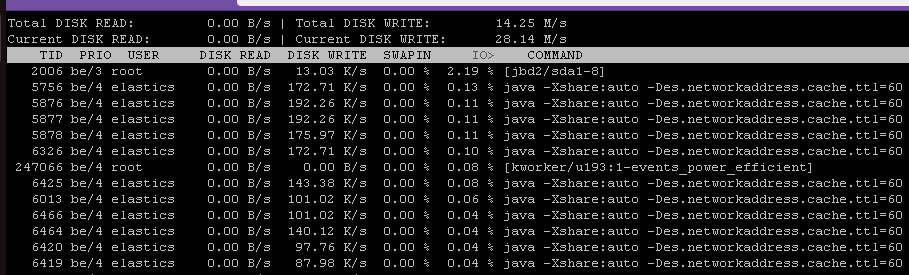
Current io rate
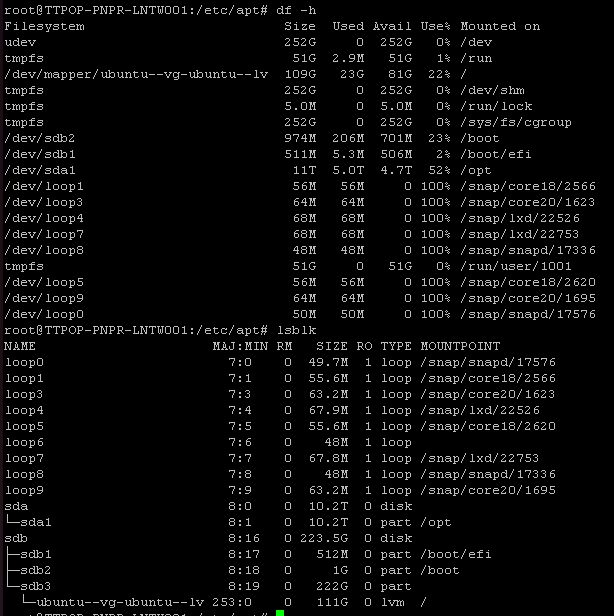
Disk config
What's Next:
Well, we started to deep dive into traffic and analyze, create widgets and all the necessary stuff to have a Management dashboard. We saw some interesting stuff too which will need a lot of troubleshooting and investigation.